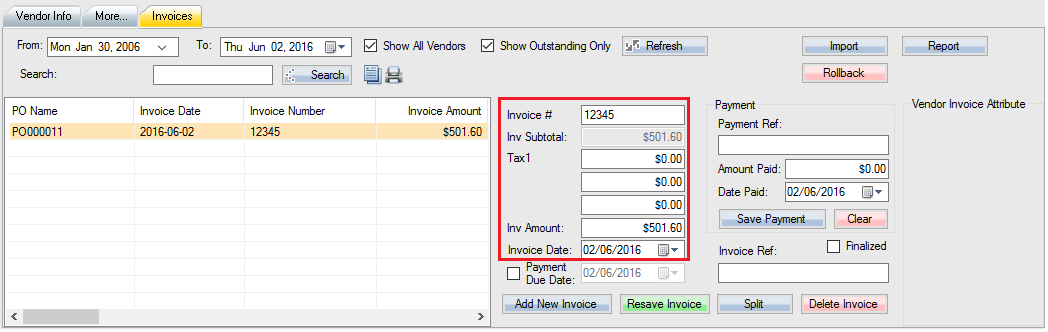
While Receiving and Posting Purchase Orders you will be able to record the vendor invoice for the items.
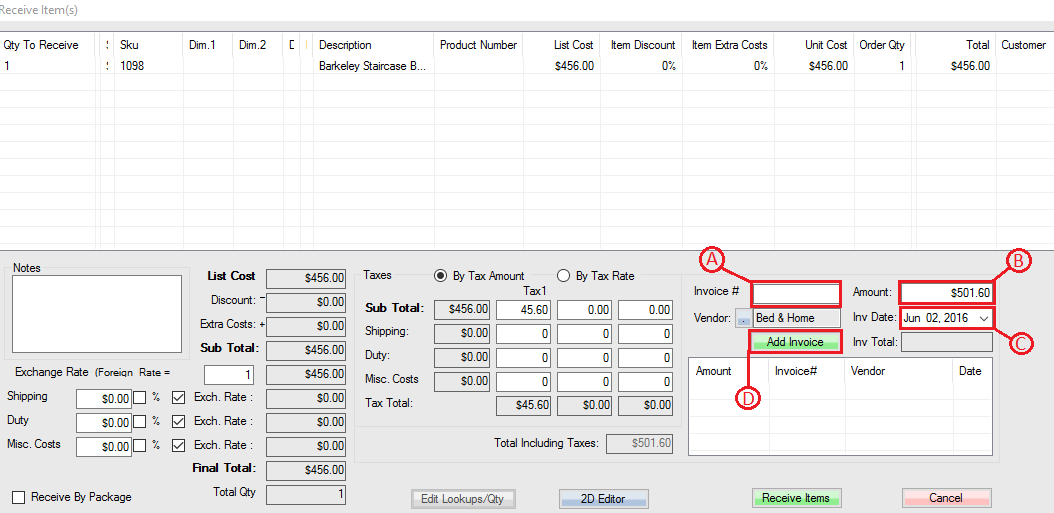
A) Type the invoice number that your Vendor provided for the invoice.
B) The current receiving items total with tax will auto-populate here. You can manually override this value if you wish before recording the invoice.
C) The invoice date will by default be set to today's date. You can backdate this to the date of the invoice is preferred.
D) Click this button to record the invoice under the Vendor's information.
Once you click on ![]() you will see the details recorded on the list-view on the screen.
you will see the details recorded on the list-view on the screen.
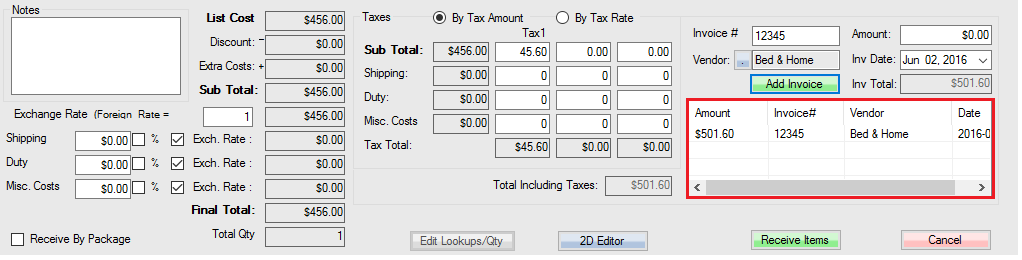
You can click on ![]() to proceed with the rest of the purchase order process. The invoice data recorded can now be found in the
to proceed with the rest of the purchase order process. The invoice data recorded can now be found in the ![]() section. Navigate to this section of the software, select a vendor and select the
section. Navigate to this section of the software, select a vendor and select the ![]() tab.
tab.
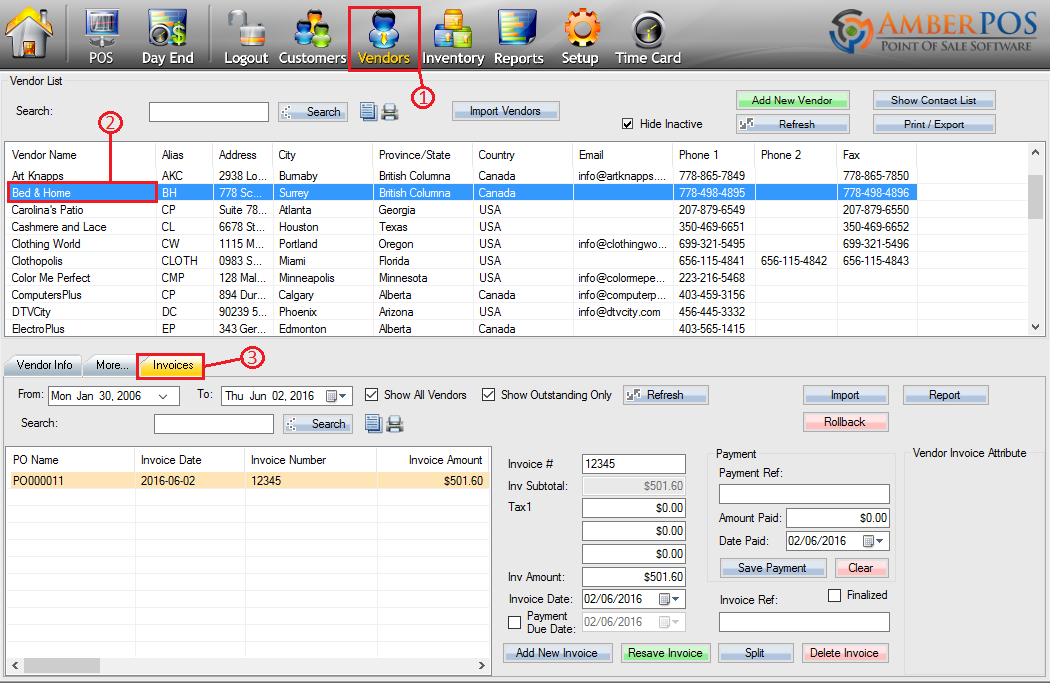
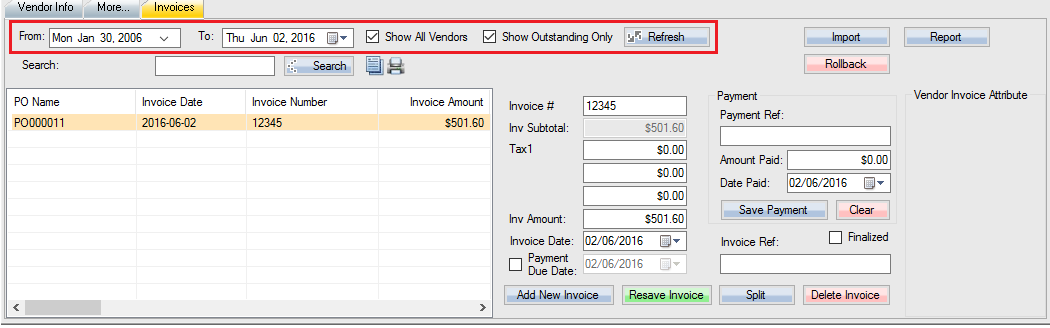
The list view here should display your PO invoice record if you chose the correct Vendor. You can also adjust the show values and date range before clicking ![]() to filter the invoice entries displayed.
to filter the invoice entries displayed.
When you select one of the records you will see the same values you originally populated for it display in the fields shown below. You can adjust these values if they have changed or been miss-recorded initially.
The Vendor invoice is considered outstanding until you record a payment. Record a payment utilizing the fields shown below.

E) Type a reference of how you send payment to your Vendor. It can be a reference to the payment type sent or a cheque number.
F) Type the value of what you sent to your vendor as a payment.
G) Choose the date that you sent the payment to the Vendor.
H) Click this button to erase the values you recorded in the fields above.
I) Click this button to save and confirm the values recorded for payment.
Additional features are available to utilize.
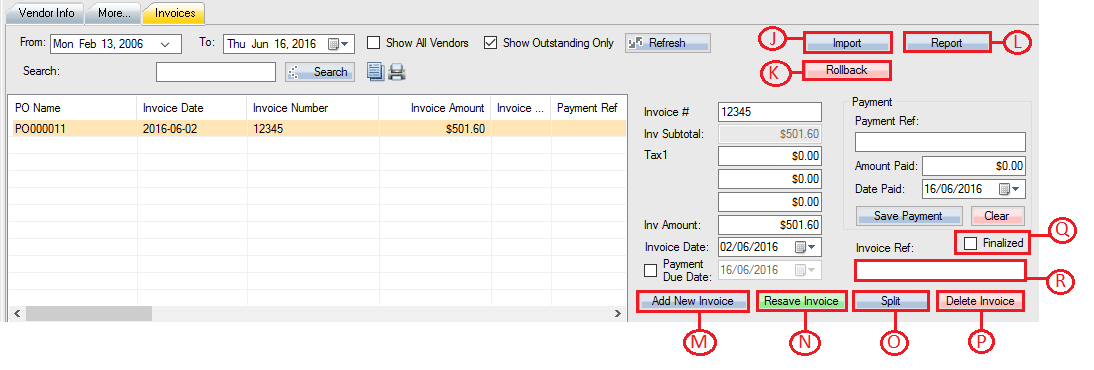
J) Selecting this button will open a file explorer window where you can choose a file to import invoice records. Once you select the file you will be presented with a window titled "Match the Columns.
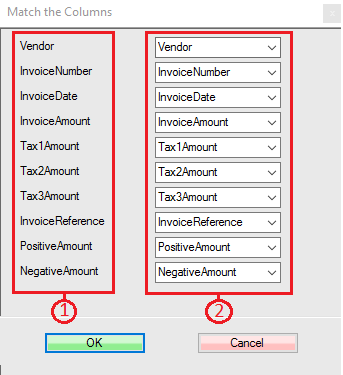
1) These are the associative fields you can import values into.
2) For each associative field you will specify which column that information should be resourced from the import file. If you do not want to import any data to that field you can choose "Default / Null" as a selectable choice.
Select ![]() to import the associated fields or
to import the associated fields or ![]() to cancel the import.
to cancel the import.
K) Click this button to undo the last import you did.
L) This button produces reporting for all invoices currently listed. If more than one vendor is listed then the report will separate the invoices by different pages for each vendor.
M) Clicking this button will generate a window like the one shown below.

If you type "NewInvoice" without quotation into the field and click on ![]() a new invoice will be generated which is a copy of the currently selected invoice.
a new invoice will be generated which is a copy of the currently selected invoice.
N) This button confirms any changes you have made to the invoice to be saved.
O) This button will create a copy of the current invoice with zero balance. You can then manually distribute the invoice balance on either invoice by adjusting the "Inv Amount" value.
P) Select this button to remove an invoice record.
Q) Enable this switch to tag the invoice as finalized to reference that no more payments need to be referenced.
R) Populate any internal reference about the invoice into this field.
//NOTE: If you missed recording the invoice you can add it after receiving the items by clicking on the ![]() Button while having the receiving set selected in the Purchase Order Post tab.
Button while having the receiving set selected in the Purchase Order Post tab.

Article Updated with AmberPOS version 04.16.06.16
Updated