A basket has no Inventory, but subtracts inventory of several other SKUs which are all sold together, as if held together in a virtual basket. You can set them up from the inventory/SKUs window.
***WHEN CREATING BASKET SKU ALSO CREATE A SKU CALLED BASKETEND AND ASSIGN A DEPARMENT AND VENDOR. OTHERWISE YOU WILL GET AN ERROR MESSAGE WHEN PROCESSING A TRANSACTION.***
1. Access the Inventory menu. From there, make sure you have the  tab selected.

2. Now create a new SKU which will be used as the basket holding the other items you wish to bundle together. Add the item's info as normal (vendor and dept are required fields), but make sure to check the box labelled Basket. Press  once you have finished.

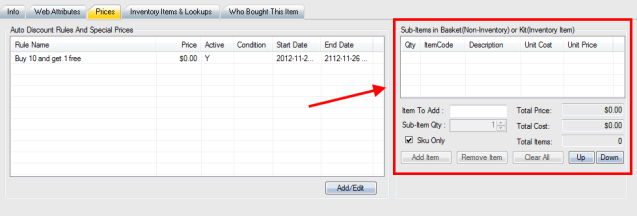
3. Then, with the same basket item still selected, click on the  tab.
tab.

Note** Newer versions of AmberPOS will have this available in it's own independent tab.
eg.
4. Use the box on the right to add items to your basket. These items will be sold together when the basket SKU is entered into a sale. To add an item to the basket, enter the SKU you wish to add into the Item To Add field, select the quantity of that item you would like in the basket with the Sub-Item Qty field, and then press  . The items and their costs will appear in the window above. You can now also change the order of the items displayed in the basket by selecting the Up and Down options.
5. Once you have selected all the items you would like to sell in your basket, click back on the  tab, and then press
  to save your changes.

6. Now when your basket SKU is entered into a sale, the items inside the basket will be automatically added to the transaction. (Note that when selling a basket SKU, you cannot delete sub-items from the transaction.)
Updated