Step 1: Enabling WebDAV on big commerce
1. Log into the admin panel on your Bigcommerce site. You can get there by entering "http://your-store-name.mybigcommerce.com/admin".
You must login to the account with "Admin" privileges to make changes to your user settings, including enabling WebDAV.

Step 1: Type in the URL .
Step 2: Use your email or username that you created for Bigcommerce.
Step 3: Use your password that you created for your Bigcommerce username/email.
2. Once logged in, click on the Users link on the top right side of the page.

3. Click on Edit for the Bigcommerce User you are going to setup Webdav under.

4. Scroll down to the bottom of the page to where it says Enable WebDAV?
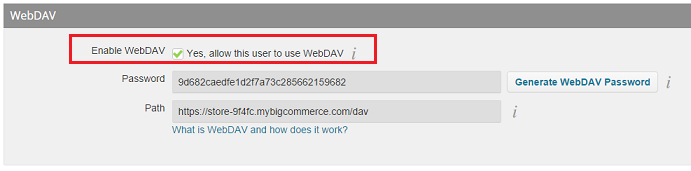
Step 1. Check the "Yes, allow this user to use WebDav" box"
Step 2. Select Save to complete the change.
**Make sure to click save at the bottom of the page before closing the browser. **
Step 2: Setting up WebDav in AmberPOS
**Important** AmberPOS will now automatically map your network drive for all computers running an AmberPOS version after October 20th, 2013 (version 4.13.10.20)
Please contact an AmberPOS representative at our toll free number (1-866-919-0123) to upgrade your software.

Fill in your WebDAV Username (e-mail you login to your bigcommerce with) and Password (found in the field below where you enable your webdav), and then the folder path which is the same as it is entered in the screenshot.
Troubleshooting options if WebDAV is not working:
- Create import folder on WEBDAV directory.
- Enable Desktop Experience windows feature on server machine
- Create a new BigCommerce user
Article written with AmberPOS version 4.14.09.16
Updated