1. Create a rental SKU
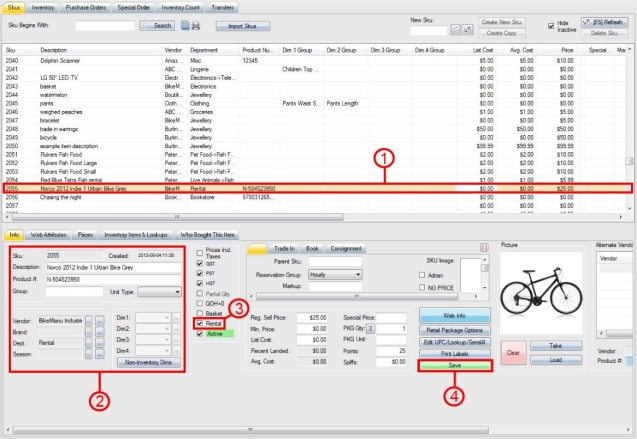
Step 1: Select or create a SKU that you will use for renting and reserving.
Step 2: Setup the information as you would with a normal SKU. Put the rental cost as the Reg. Sell price. (See "Adding a new SKU" for more details)
Step 3: Select the Rental checkbox to designate the SKU as a rental.
Step 4: Select Save to finalize the changes.
***Note: Make sure to add the quantity of this item. Even though it is a rental, you still have at least 1 QOH.***
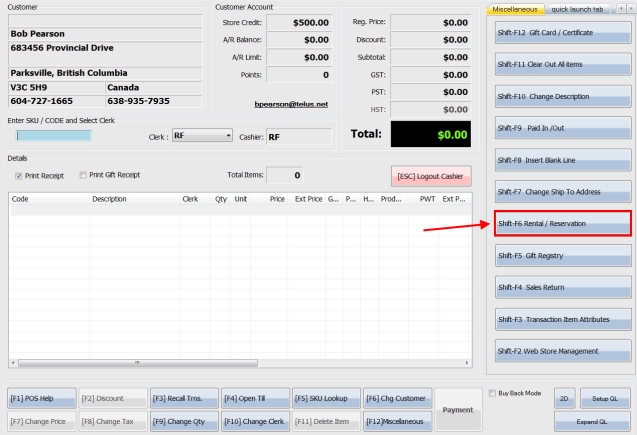
2. Create billing intervals by first accessing the POS screen and then selecting the Rental / Reservation option.
3. Select the Setup option in the top right corner of the screen.

4. Select Setup Rental Options from the drop down menu that appears.

5. Setup the rental and billing options in this screen:
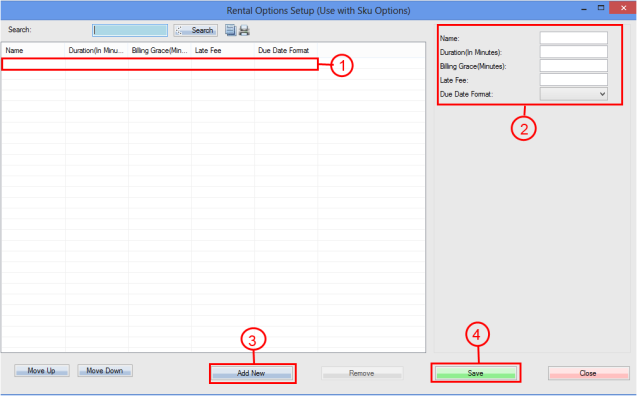
Step 1: If you already have an existing rental option, select it here to edit.
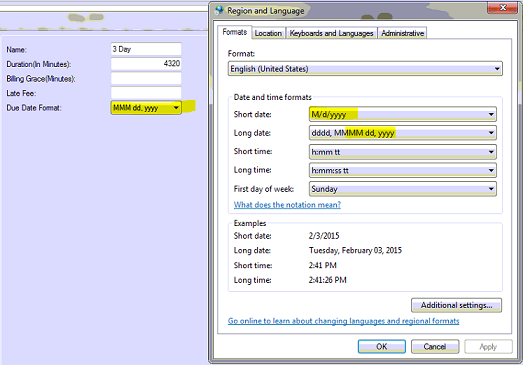
Step 2: If you are creating a new option, fill out the attribute information here including the name, duration of rental, billing grace (grace time before late fee), the late fee, and format of the due date. (If the fields are grey, first select Add New as you would in step 4.) Make sure the date format matches what you have setup in Windows for your computer.
eg.
Step 3: Save your option to complete changes.
Step 4: Once you save the option, the Add New option will be available to create another option.
6. Exit the previous window and select the Setup option in the top right corner of the screen again. Then, select setup store hours from the same drop down menu that appears.
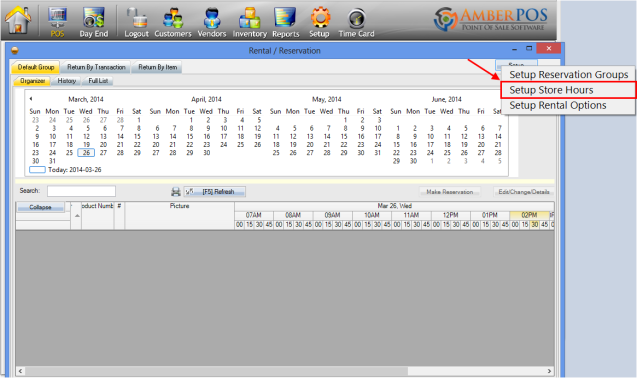
7. Setup the store hours of operation and available reservation time slots.

Step 1:**Note** Select the Closed option to use certain options to then specify which days your store is closed.
Step 2: Designate your store hours of operation here.
Step 3: Select the days of operation.
Step 4: Specify the date range that the schedule will last for.
Step 5: Select Add / Change to apply the schedule changes to the list on the left.
Step 6: Select Save Settings to finalize the changes and return to the previous screen.
8. Next, you have to access the inventory menu again, select the same rental SKU that you are going to rent out, and select the Retail Package Options option.
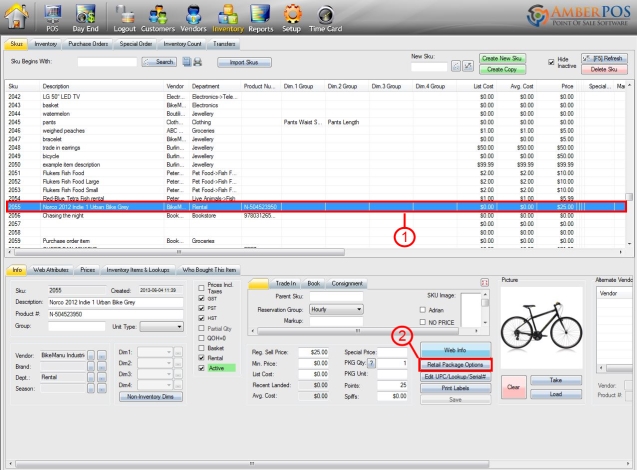
Step 1: Select your rental SKU again.
Step 2: Select the Rental Package Options button.
9. Setting up the SKU options for rental:
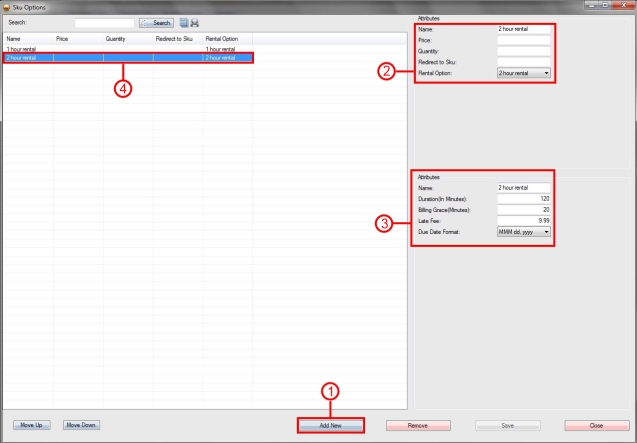
Step 1: Select Add New to create a new SKU rental option.
Step 2: Setup the rental option settings here. The most important field is the Rental Option field because here you choose the rental option that you created earlier and assign it to the rental SKU.
**Note** If you leave the Price field blank, the default price will be the Reg. Sell Price of the rental SKU. If you fill in the Price field it will automatically overwrite the Reg. Sell Price in the POS screen when you process and sell the rental.
Step 3: This section is a repeat of the previous Rental / Billing Options screen. You can simply change the same settings again here if required (for the particular SKU).
Step 4: Every time you add a new attribute, it will appear in the list here.
10. **Optional** Make a reservation. (Click here to see guide)
11. Access the POS screen, select a customer, and rent it out by processing a transaction.
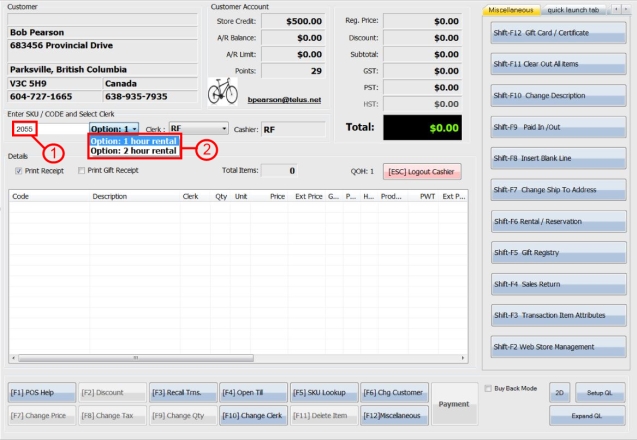
Step 1: Enter the rental SKU in the transaction.
Step 2: A drop down menu will appear with your setup rental options. Select the time option that the customer wants to rent for.
Revised 26/03/2014
Updated