***IMPORTANT***
- Cannot integrate with finger scanner devices in Windows 10.
- Hardware utilization is restricted to the Integrated Biometrics Curve.
1. To set up your new Integrated Biometrics fingerprint scanner and use it in AmberPOS first download the driver here. Unzip the folder to a location on your computer. You should also plug in your fingerprint scanner to your computer.
2. Open Control Panel, then Hardware and Sound. Open your Device Manager.

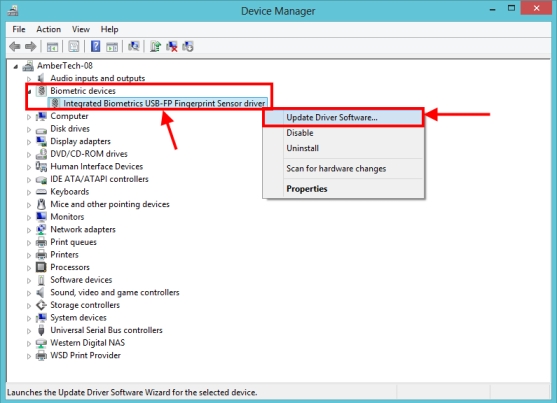
3. Find your fingerprint scanner, it may be under biometric devices or may not be recognized and will be called NetAccessII. Right click on the device and click on Update Driver Software.
4. A window will pop up and you need to choose Browse my computer for driver software.

5. Using the browse button, navigate to where you unzipped the driver folder on your computer. Click on next and the driver will be installed.

6. Open AmberPOS and Login.Then access the Setup menu.
7. Under the Setup menu, select the Printers and Local Settings tab. Add the Fingerprint Scanner using the drop down menu to select Integrated Biometrics. Click on Save.

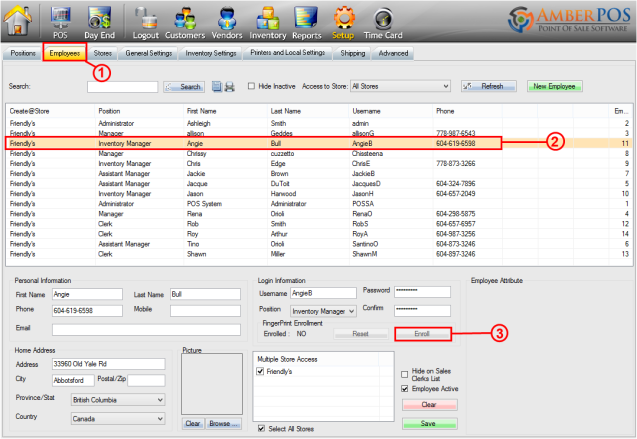
8. To enroll an employee with their fingerprint, navigate to the Employees tab and select the employee. Then click on Enroll under Login Information.
9. An Enroll Finger Print window will open. Follow it's instructions, placing the employee's finger on and off the scanner as instructed to capture it into the program. You will see an image of the fingerprint as you go. Click on OK when you are finished.

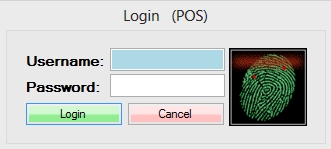
10. Now when the employee tries to log on the system or the POS screen and you see a green image of a fingerprint with a red line running up and down, they do not need to type in anything to log in. Just have them place their finger on the scanner and it will log them in.
Revised 25/03/2014
Updated