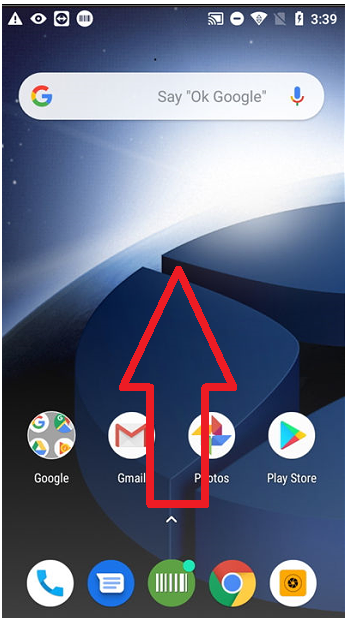
The MEMOR10 scanner can have some settings managed to assist your scan results. To access these controls you can navigate to the the settings app on the device. First open the app drawer by swipping up from the bottom of the screen.
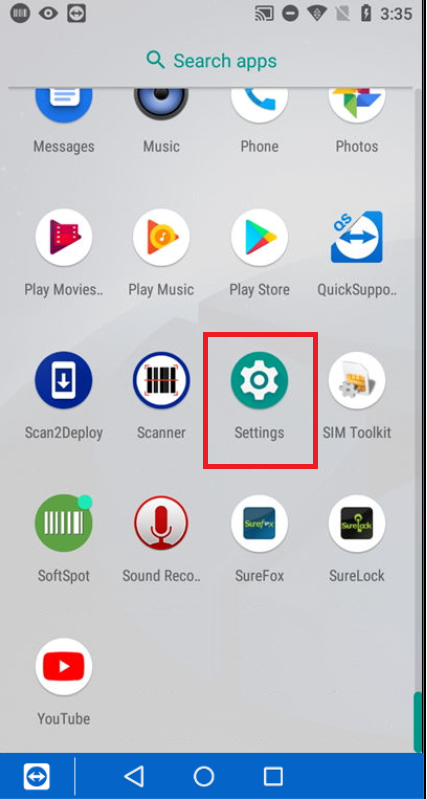
Select settings.
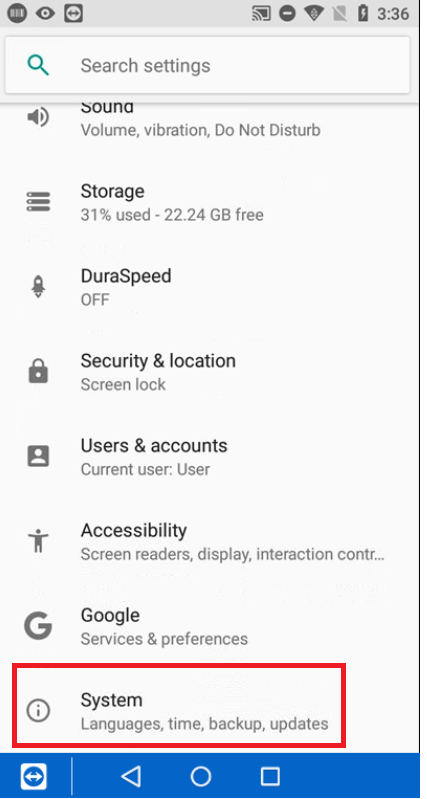
Next go to System Settings.
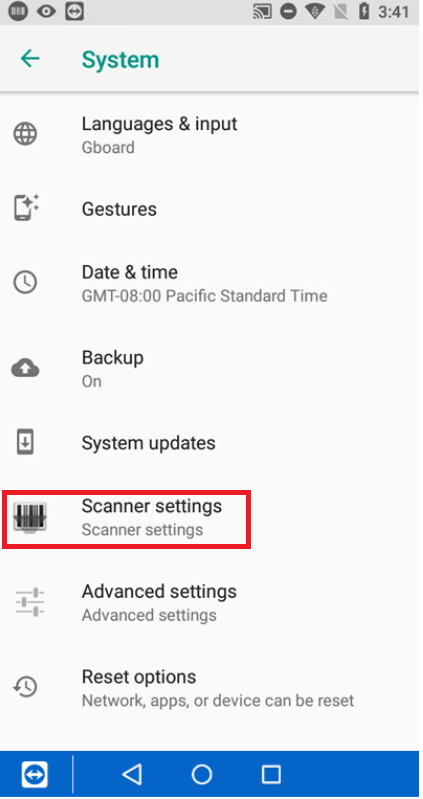
Select Scanner Settings.
There are 3 different scanner settings to consider managing.
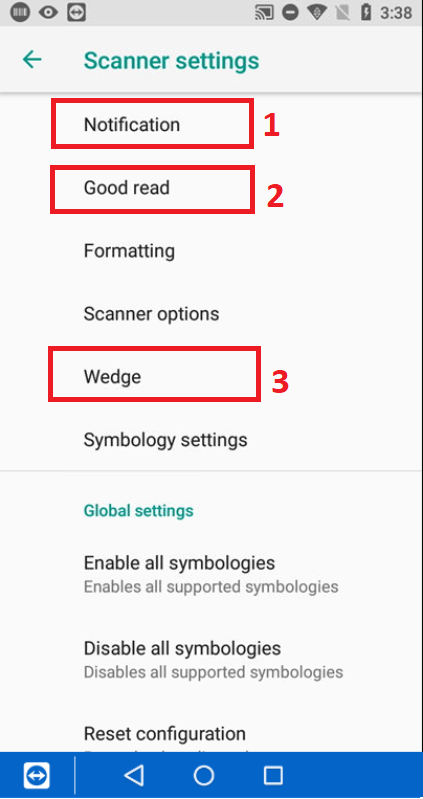
1. Choose this option to enable the keyboard wedge. This needs to be enabled so that scanned results will populate in 123Count or any other text field in the scanner. Make sure that the check boxes shown below is enabled.

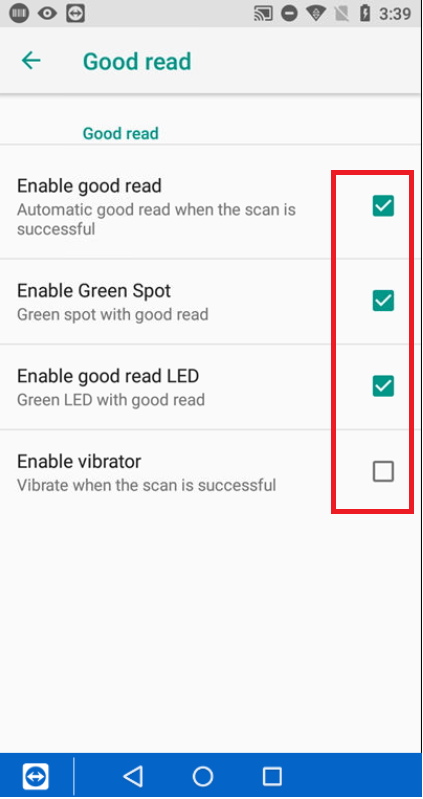
2. Good Read settings influence the indication of a successful barcode scan performed by the scanner. Adjust these settings by enabling or disabling the check boxes shown below.
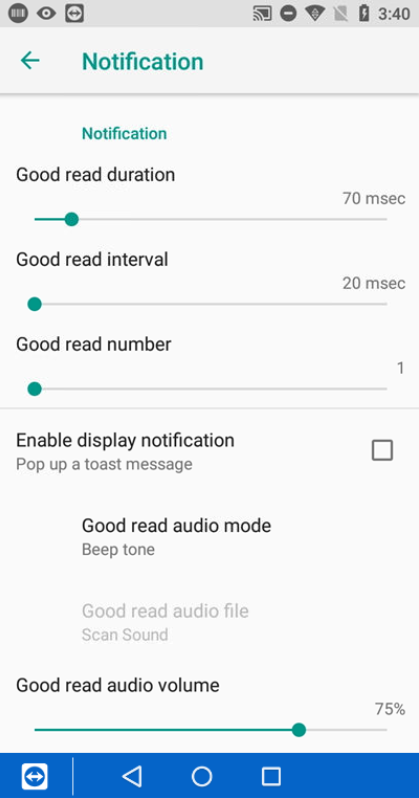
3. Additional notification controls are available here to adjust how the Good Read results are displayed or heard.
Test scanning with the barcode device to preview the results of the adjustments made.
Scanning Symbologies
If you are having issues with the check-digit not being scanned at the end of a barcode then you will need to enable a setting to include this character in the scan result. On the inventory scanner Navigate Settings.
In settings choose System Settings
Select Scanner Settings.
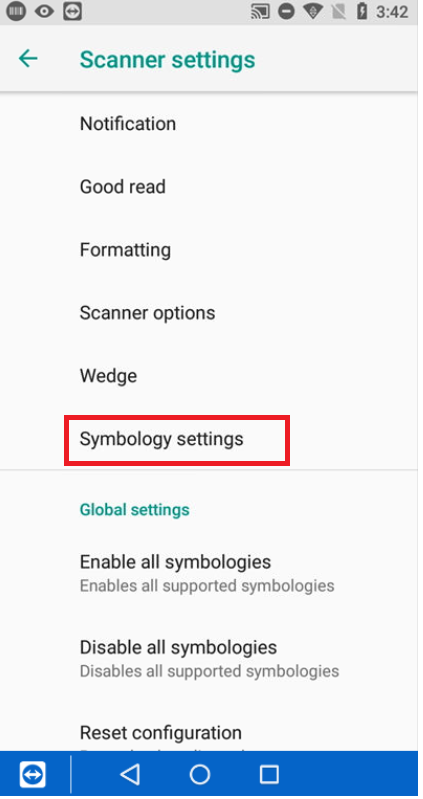
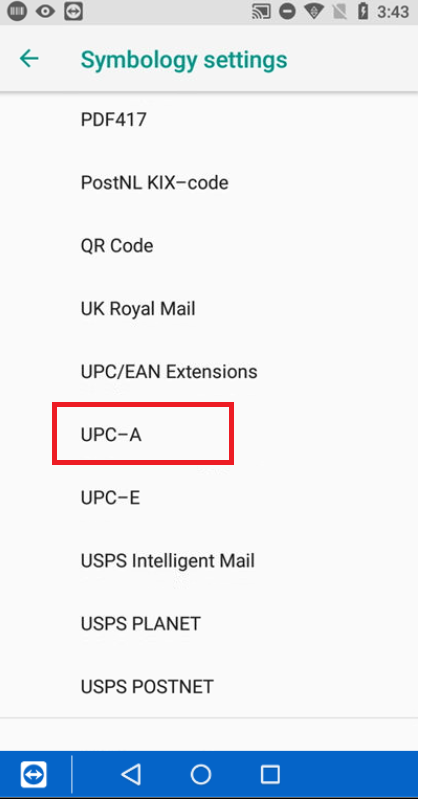
Navigate to open Symbology Settings.
UPC-A
Navigate and select the settings option for UPC-A
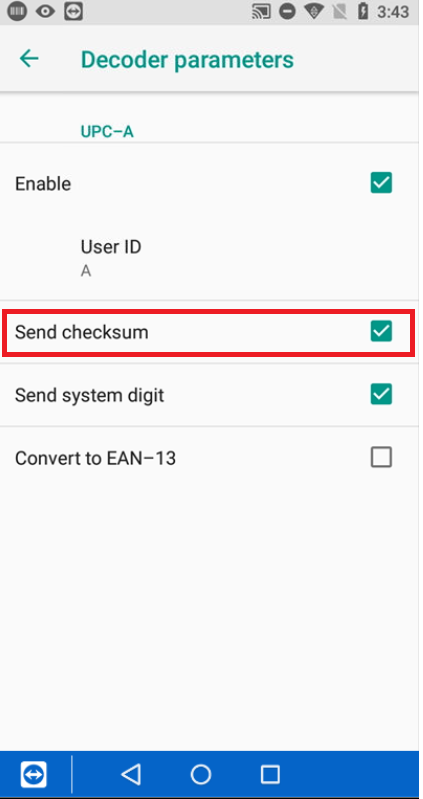
To Enable Leading Digit or Check Digit on a UPC code check the settings below.
Checksum is Check Digit(Last Digit) at the end of a UPC code. 059200708124
System Digit is Leading Digit(First Digit) at the front of a UPC Code. 059200708124
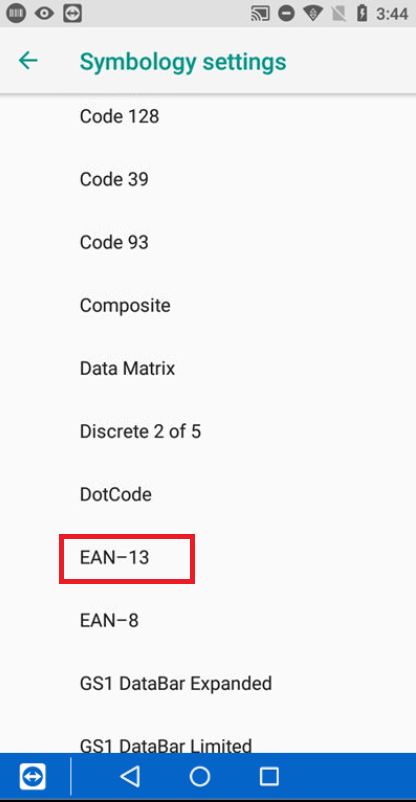
EAN-13
Navigate and select the settings option for EAN-13.
Enable the setting for checksum as shown below.
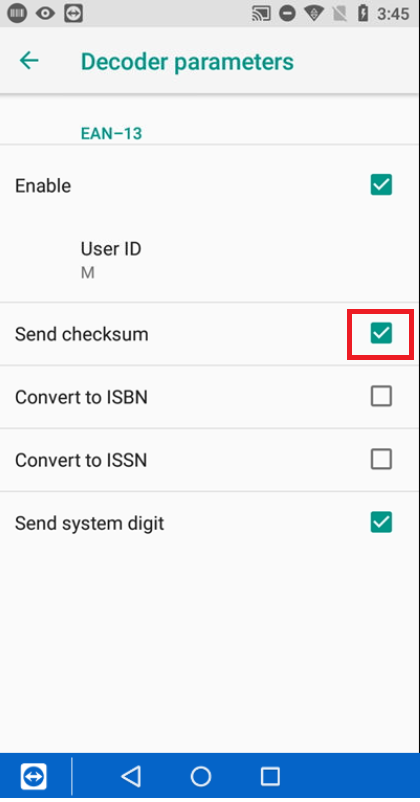
Now when you scan a UPC-A or EAN barcodes you will notice the additional character added to the scanned result.

Updated