This article provides information about how to upload your scanned inventory list from your Android inventory scanner to AmberPOS. In AmberPOS there is a feature that will upload the list while managing an inventory scanner in Purchase Orders or in the Inventory Count.
While you are managing inventory scanner devices in the software click on the button and you will be presented with options to manage the device.
Load List From Scanner
Click on to download the scanned sku list from the scanner into AmberPOS.
If you attempt to communicate to the scanner you may receive the following error message.
This message occurs as there is a conflict with the portable devices listed Windows. To help correct this you can open the device manager and remove all other devices besides your own. Remove any other drives that are connected as they may throw off the path for Amber to load the list.

You should have better success when attempting to upload the file after uninstalling these listed devices.
When successfully loaded, the item quantities will appear in the AmberPOS like the example below.
After populating the item information in AmberPOS and before disconnecting the scanner make sure to click on and then click on
. This will empty the scanned list on the scanner so you can start scanning a new section without data from the past section conflicting.
Load List From File
If you are having difficulty populating the sku list from the scanner you can alternatively copy the file onto your computer and upload it from there. Connect the scanner to the computer and select it from your computer's file explorer. Open the Internal storage on the scanner.

Select the file "invent.txt" and copy this to a location on your computer.
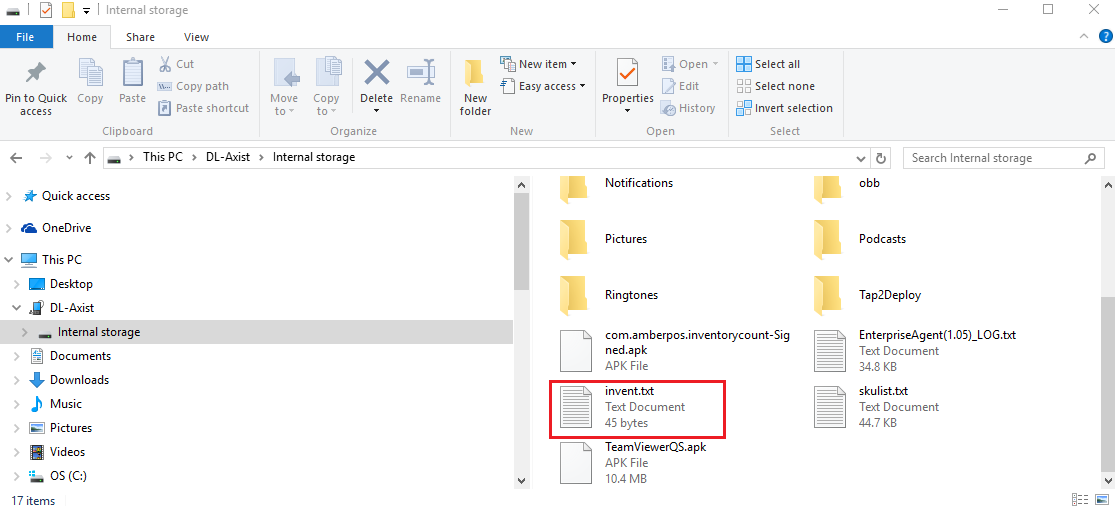
When doing 'Load list from Scanner' you may encounter the following error.

This occurs if you have saved your counted items into a file on the device. There can be multiple files and selectively they would have to be chosen.

In this case scenario, the file will have a different numerical name while being saved on the device. You can select the name file, like the one shown below.

Once the file is successfully loaded to the computer, you can manually delete the file on the scanner from file management.
Difficulty Communicating with Datalogic Device (Enterprise Reset)
If you are unable to access the Datalogic DL-AXIST Device on the computer when connected to the computer then you may need to restore it to the Manufacturer settings. Be sure to test different USB ports, restart the device and try a different USB connection cable before pursuing this option.
Navigate to the Settings on the Datalogic scanner.

Swipe your finger up or down to scroll through the settings options available. Select the "Backup & reset" option once displayed.
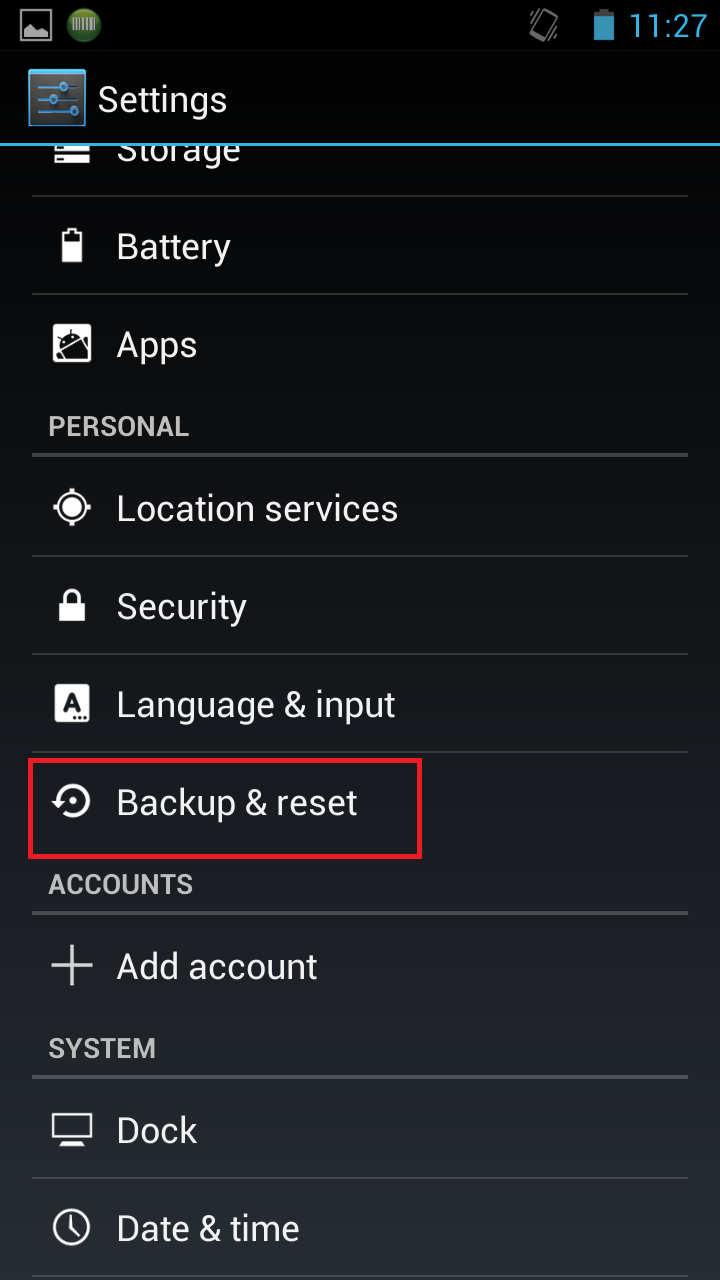
Choose the option for "Enterprise reset" to return the device to the manufacturer's default state. Make sure you DO NOT choose the option for "Factory data reset" as this will erase needed tools on the device that were installed by the manufacturer.
//NOTE: This will erase all files including scanned inventory lists from the scanner****
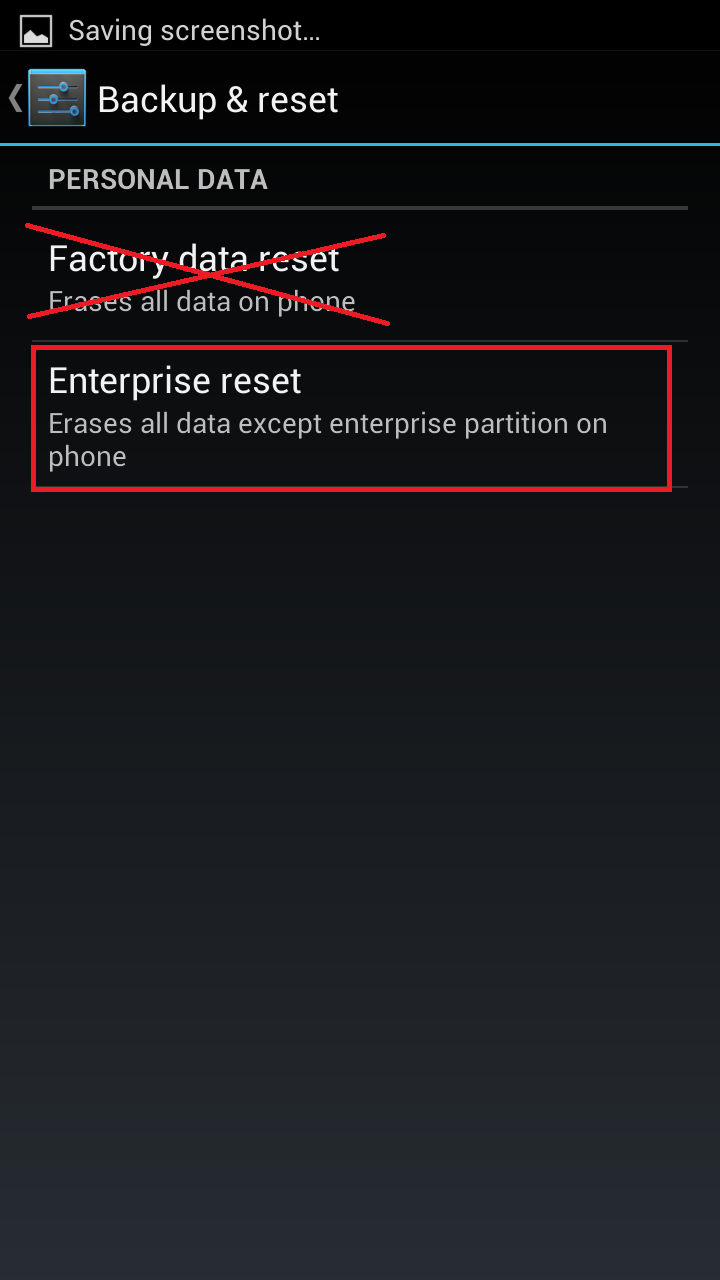
Once the device has completed the reset you can test accessing file content on the scanner from the computer that it is connected to.
Additional Considerations (After Reset)
Enable Scanning Suffix
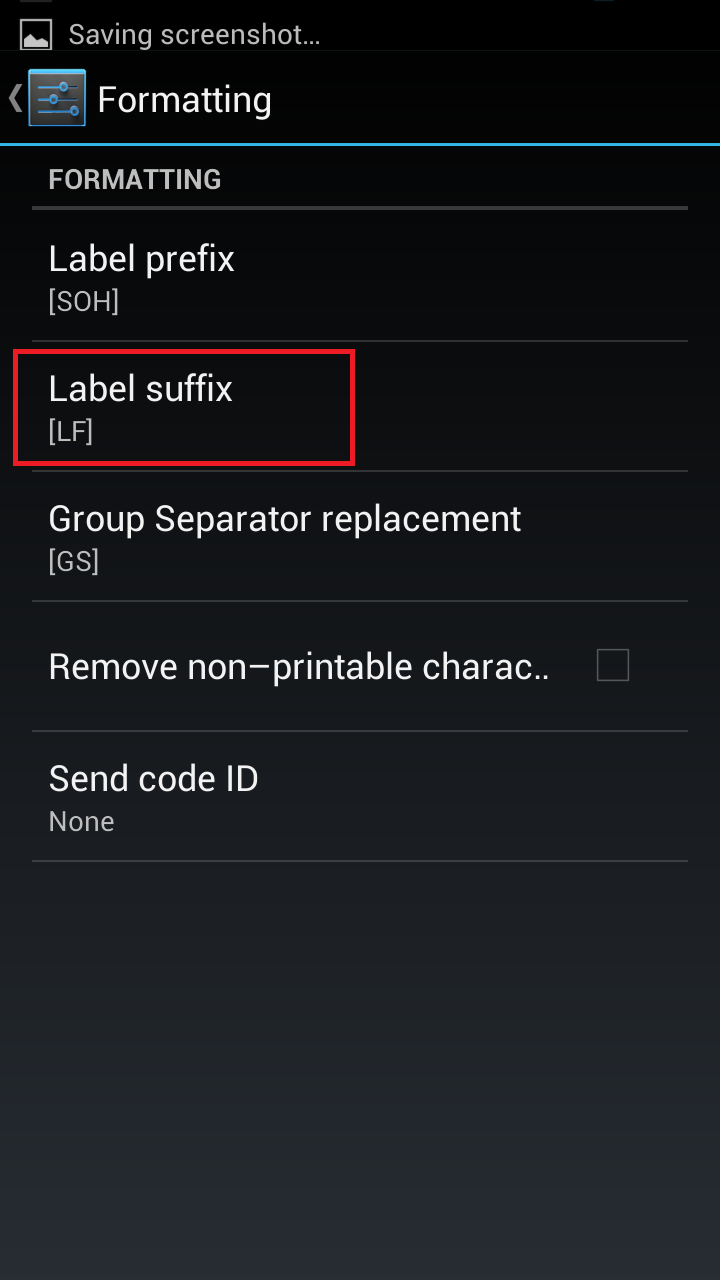
This setting will enable a new line entry after every scan so you do not have to prompt the item confirmation for each code scanned.
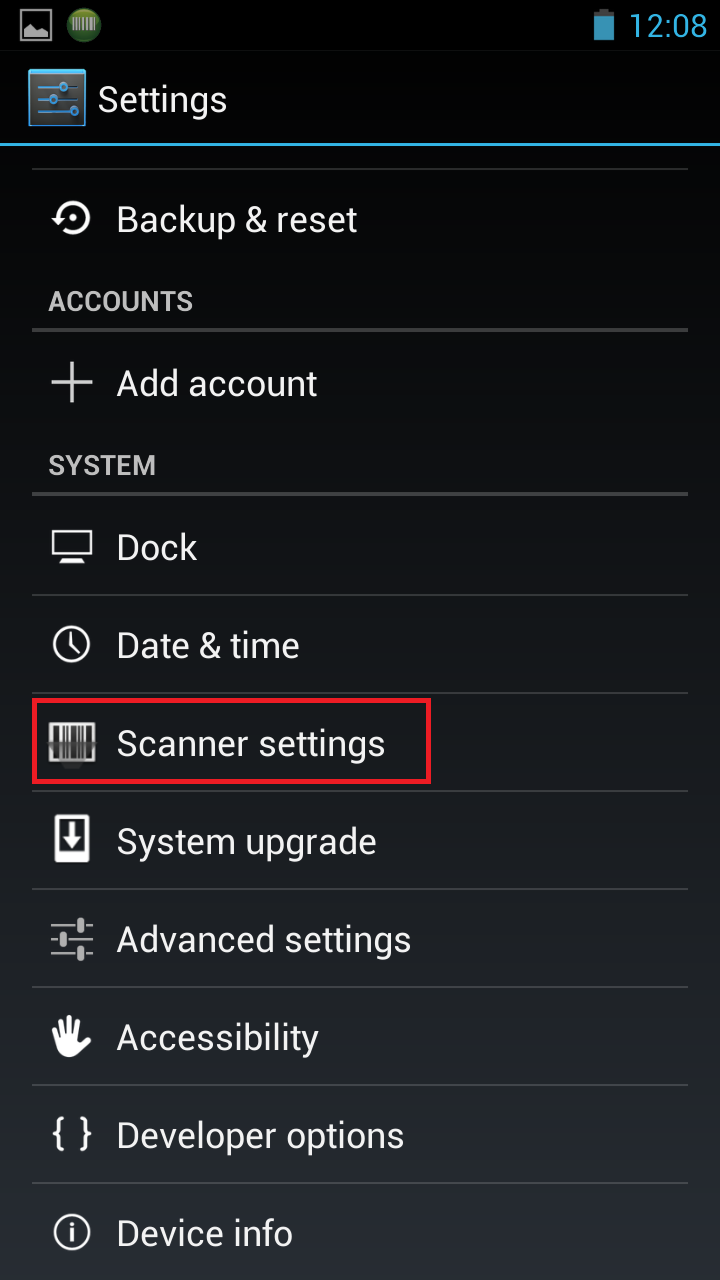
Navigate to Settings.
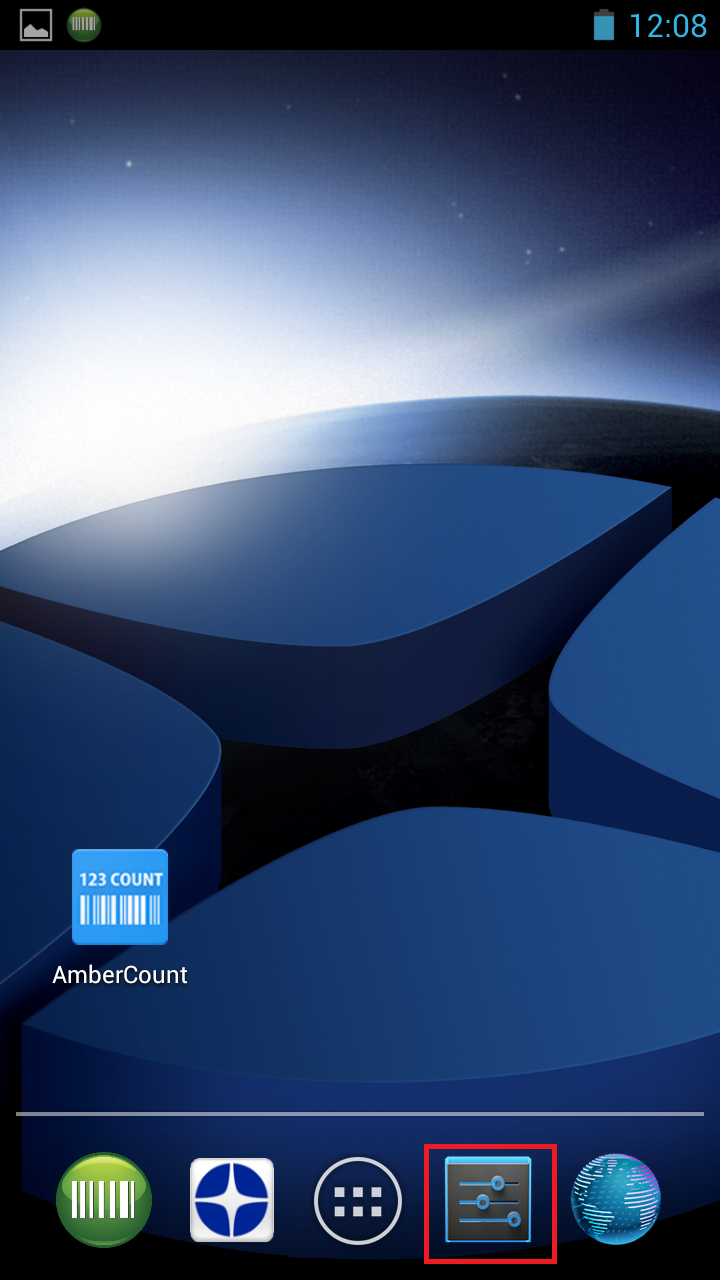
Next navigate to Scanner Settings.
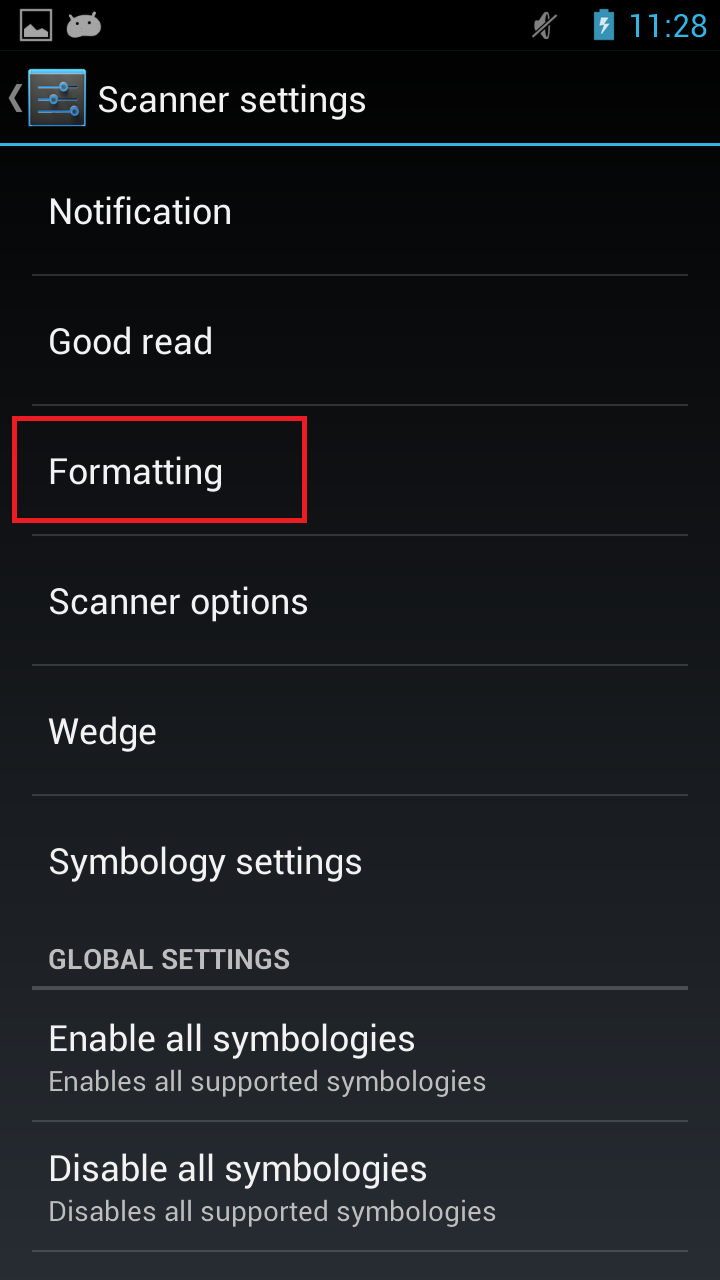
Select the menu option for "Formatting".
Select the option "[LF]" for Label Suffix.
See the article for Adjusting Scanner Settings to enable other settings needed for successful scan results.
Related Articles:
Datalogic DL-AXIST Scanner Guide
Article Updated with AmberPOS version 04.16.06.18
0 Comments